This article describes how to set up your own server or VM outside of FABRIC with Xilinx Vivado toolchain specifically for P4 workflows although a similar workflow may work if you are using VHDL.
Provision a server or VM and perform a basic Vivado install
- Create a VM (or use a bare-metal server) with at least 8 cores/64G RAM/500G disk. You can use Ubuntu 20.04 or Ubuntu 22.04 image. The Vivado tools are 50-70 GB each, so much disk space is needed. Also some stages of the compile process can take advantage of multiple cores to speed up the process.
- You should have the FPGA installed in the server or have the ability to pass FPGA into the VM.
- You can use the following script to install the needed dependencies (or execute steps by hand):
#!/bin/bash

# user and group you will be executing as
usr=ubuntu
grp=ubuntu

# perform updates and install Vivado dependencies
apt-get update
apt-get install -y xserver-xorg-core --no-install-recommends --no-install-suggests
apt-get install -y libxrender1: libxtst6 libxi6 xfonts-base xfonts-100dpi font-manager libncurses5 libtinfo5 libncurses5-dev libncursesw5-dev python3-yaml python3-jinja2 python3-click python-is-python3 python3-pip zip tree
apt-get remove -y docker docker-engine docker.io containerd runc
apt-get install -y ca-certificates curl gnupg lsb-release rsync

# the following section installs Docker and may be optional for some workflows
mkdir -m 0755 -p /etc/apt/keyrings
curl -fsSL https://download.docker.com/linux/ubuntu/gpg | gpg --dearmor -o /etc/apt/keyrings/docker.gpg
chmod a+r /etc/apt/keyrings/docker.gpg
echo "deb [arch=$(dpkg --print-architecture) signed-by=/etc/apt/keyrings/docker.gpg] https://download.docker.com/linux/ubuntu \
  $(lsb_release -cs) stable" | tee /etc/apt/sources.list.d/docker.list > /dev/null
apt-get update
apt-get install -y docker-ce docker-ce-cli containerd.io docker-buildx-plugin docker-compose-plugin
usermod -a -G docker ${usr}

# create a location where Xilinx tools will be installed and make sure your user has access to it
mkdir -p /opt/Xilinx
chown ${usr}:${grp} /opt/Xilinx- Download the Vivado tool as SFD (Single File Download) and also any appropriate update packages to the new host and untar them individually
- When logging into the host over SSH be sure to use the
-Yoption to enable X11-over-SSH tunneling (if using a VNC client or working directly from the desktop this is not necessary)
- When logging into the host over SSH be sure to use the
- Run
export VitisNetP4_Option_VISIBLE=truein the shell so P4 option is shown in the installer (see Vitis Networking P4 Secure site). - Run
xsetupin the directory created when you untarred the tool packages (e.g.Xilinx_Unified_2022.1_0420_0327)
- Select Vivado ML Enterprise and agree to the terms(be sure to select the P4 option). Select
/opt/Xilinxas the installation location. Wait for installer to complete. - Perform the same steps (execute
xsetup) for any update packages you untarred. Use/opt/Xilinxas the installation location.
Obtaining IP licenses for Xilinx products
Vivado requires multiple IP licenses to compile P4 into bitfiles. These can be either node-locked or served by a license manager like flexlm. Here we describe how to work with node-locked licenses, flexlm setup is outside the scope of this document.
- After you create an AMD account and join XUP you can visit the licensing site:
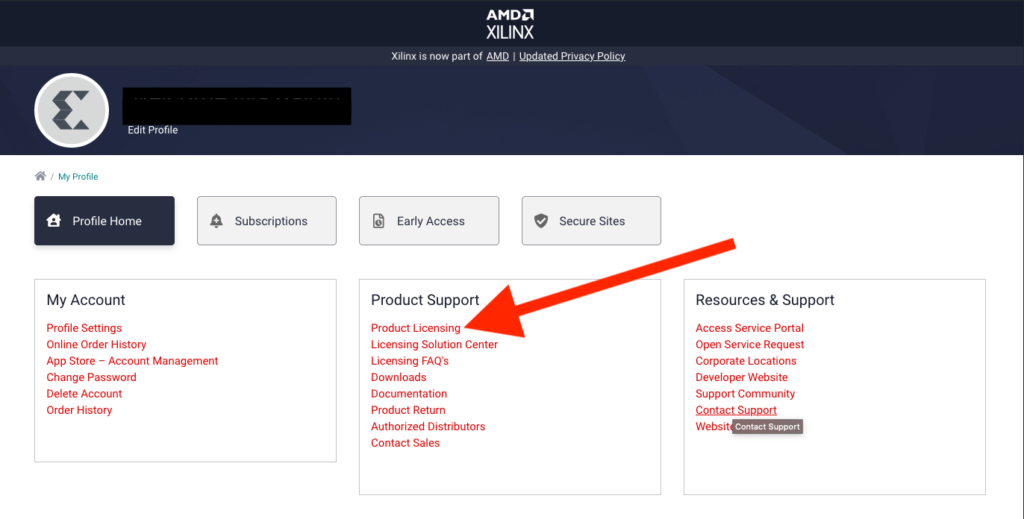
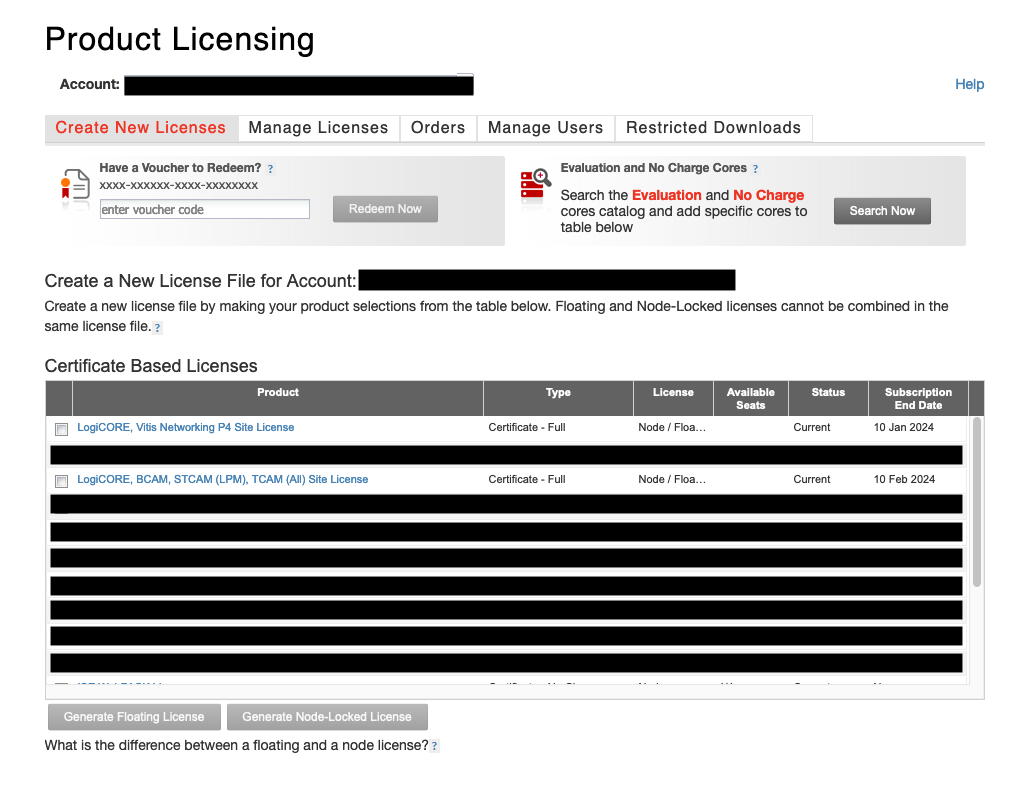
- To work with P4 you need to request a donation ‘P4 networking’ license (through the Donation Program page), and make sure ‘LogiCORE, BCAM, STCAM, TCAM’ is also included (see below). The licenses will be installed in the licensing site for you once the request is approved. Typically they are granted for 12 months and need to be renewed after that by contacting XUP program.
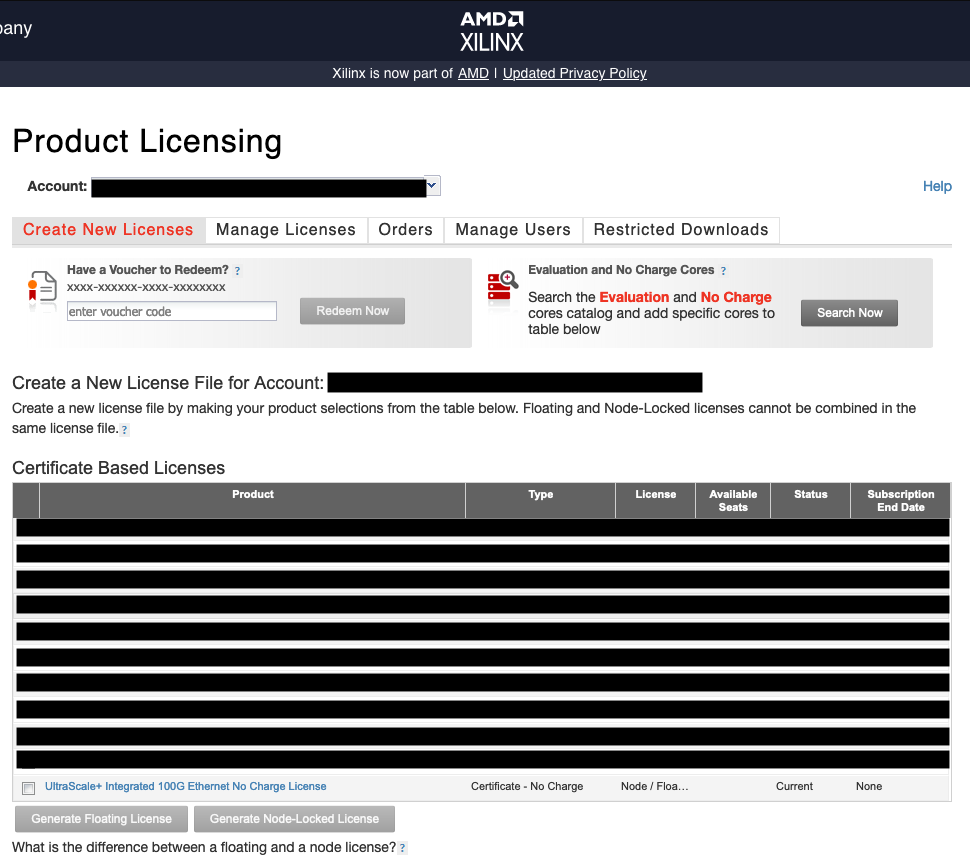
- You also need a free (no need to request, this is DIY) Ultrascale+ (the plus is important) CMAC 100G license. To get it visit this page, then click on ‘Get License.’ This will take you to the licensing portal and at the bottom of available licenses you will see the ‘Ultrascale+ Integrated 100G Ethernet No Charge License’.
- Note that this license tends to ‘fall out’ and may need to be re-added if you are e.g. regenerating your node licenses.
- Once all IP licenses are visible in the licensing site (you may need to scroll through them to see all; in the pictures below licenses not relevant to the process are blacked out):
Generating node-locked licenses
- License manager UI can be invoked directly from command line as
vlmassuming you’ve executed the settings script (path is version dependent, example is:. /opt/Xilinx/Vivado/2022.1/settings64.sh) and is located in corresponding Vivado/bindirectory (e.g./opt/Xilinx/Vivado/2022.1/bin/vlm). It should be on your$PATHif you’ve sourced the settings script correctly.vlmcan produce identification information (for node-locked licenses its the first MAC address) for a host helpful in generating node-locked host licenses. - Run
vlmto figure out host name and MAC addresses, then use the licensing website to generate a node-locked license for:- Vitis P4 Networking
- LogiCore BCAM, STCAM
- Ultrascale+ 100G Ethernet CMAC
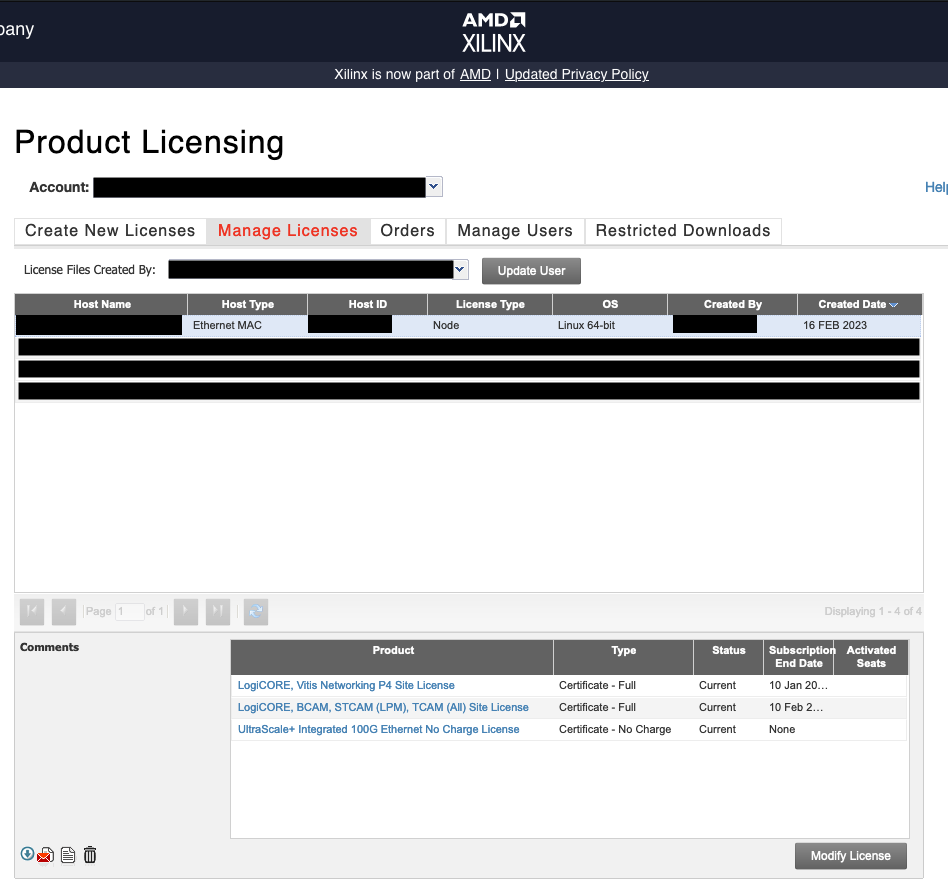
- Once the process is completed, licenses are automatically emailed to your registered email address as a file
Xilinx.lic - Install the file under
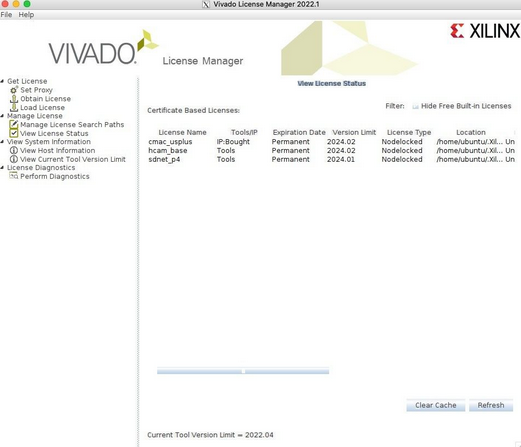
~/.Xilinx/if it exists (you can just startvivadoonce to create it) and then check the status of the license invlm(may need to click ‘Refresh’) to see it (below see vlm UI)
