
Most users start with FABRIC’s pre-configured JupyterHub as described here. Advanced users may prefer running the FABRIC Python API on a laptop or server. This guide shows how to install the API and run the Jupyter example suite in a Python virtual environment on your own machine.
Prerequisites
Python 3.9 – 3.13 (inclusive)
Using Python <3.9 is the most common reason local installs fail.
Check your Python3 version. If it is less than >=3.9 or <=3.13 you need to upgrade.
python3 --version
Python 3.11.9
Create and activate a virtual environment
You can use virtualenv. Use pip3 to install the python virtual environment software
bash-3.2$ pip3 install --user virtualenv virtualenvwrapper
bash-3.2$ virtualenv ~/fabric-jupyter
bash-3.2$ source ~/fabric-jupyter/bin/activate
Configure your FABRIC Token
Use the portal to Generate a FABRIC token. Refer here for details on how to create a token.
Create a working directory and place your token JSON there:
(fabric-jupyter) bash-3.2$ mkdir -p ~/work
# Save your token as: ~/work/id_token.json
(fabric-jupyter) bash-3.2$ ls -ltr ~/work
# ... id_token.json
Point the environment variable to the token file:
(fabric-jupyter) bash-3.2$ export FABRIC_TOKEN_LOCATION=~/work/id_token.jsonAt this point your environment is ready to run an application using the FABRIC API. If you have an existing FABRIC application you can run it now and skip the rest of this article. If you want to use FABRIC via a local Jupyter notebook continue reading.
Install Jupyter in the Virtual Environment
Install Jupyter in the virtual environment using pip3.
(fabric-jupyter) bash-3.2$ pip3 install jupyterRun the FABRIC Jupyter-examples Notebook Suite
Clone the examples:
(fabric-jupyter) bash-3.2$ git clone https://github.com/fabric-testbed/jupyter-examples.gitInstall notebook requirements:
(fabric-jupyter) bash-3.2$ pip install -r jupyter-examples/requirements.txtSome of the examples use bash. You can install the Jupyter bash kernel if you want to use these notebooks.
(fabric-jupyter) bash-3.2$ pip3 install bash_kernel
(fabric-jupyter) bash-3.2$ python -m bash_kernel.install
Run the FABRIC table of contents notebook.
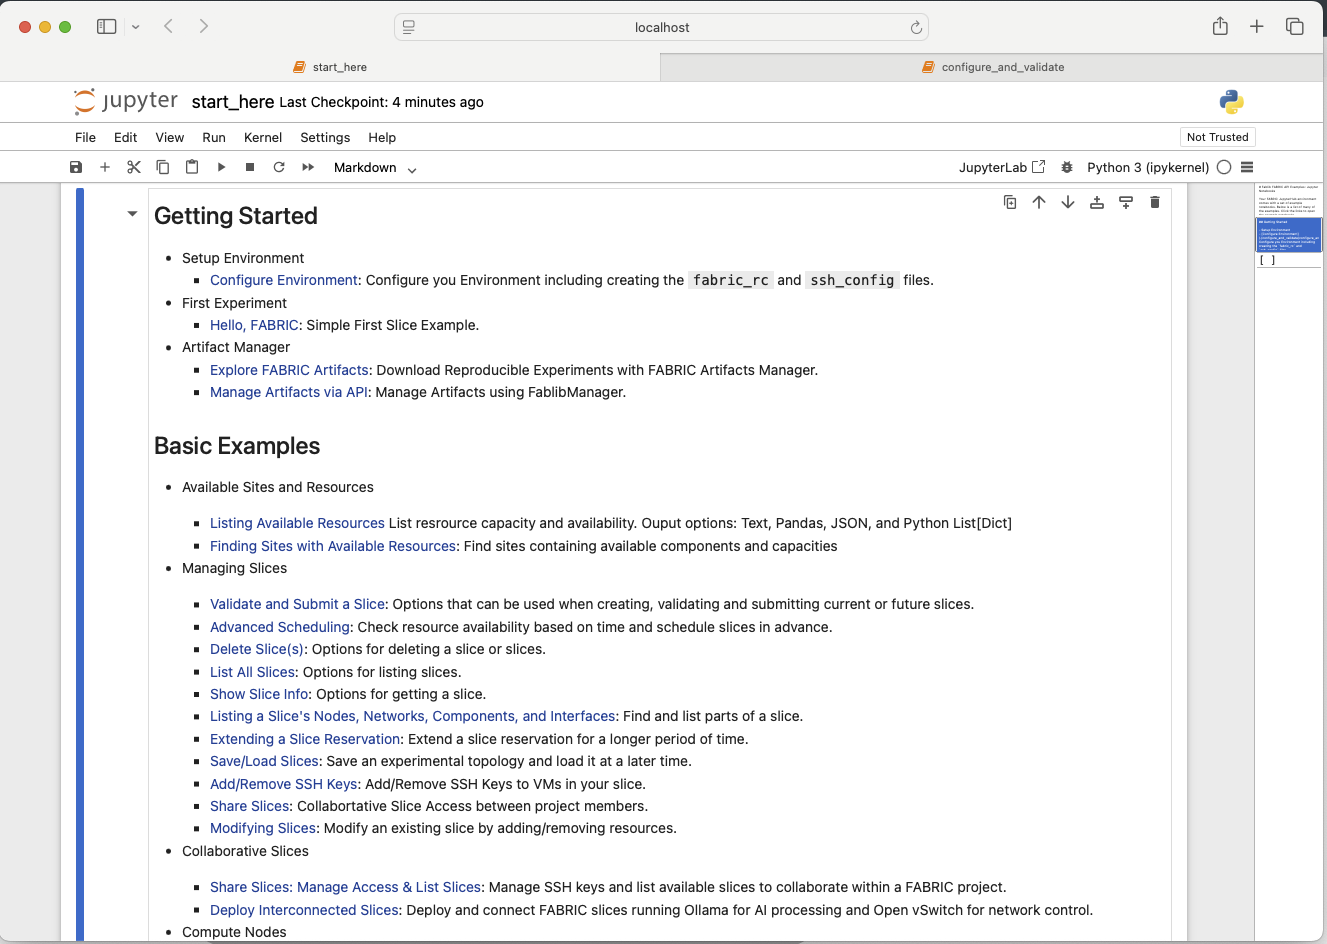
(fabric-jupyter) bash-3.2$ jupyter-notebook jupyter-examples/start_here.ipynb This should open the Table of Contents notebook in a new browser tab.
Start running the example notebooks locally.
Once the environment is configured, you are ready to run the other example notebooks locally.
First, click on the Configure Environment notebook to set up your environment.
NOTE: Run this notebook twice as the cell with save_config may throw error first time as ~/work/fabric_config directory doesn’t exist.
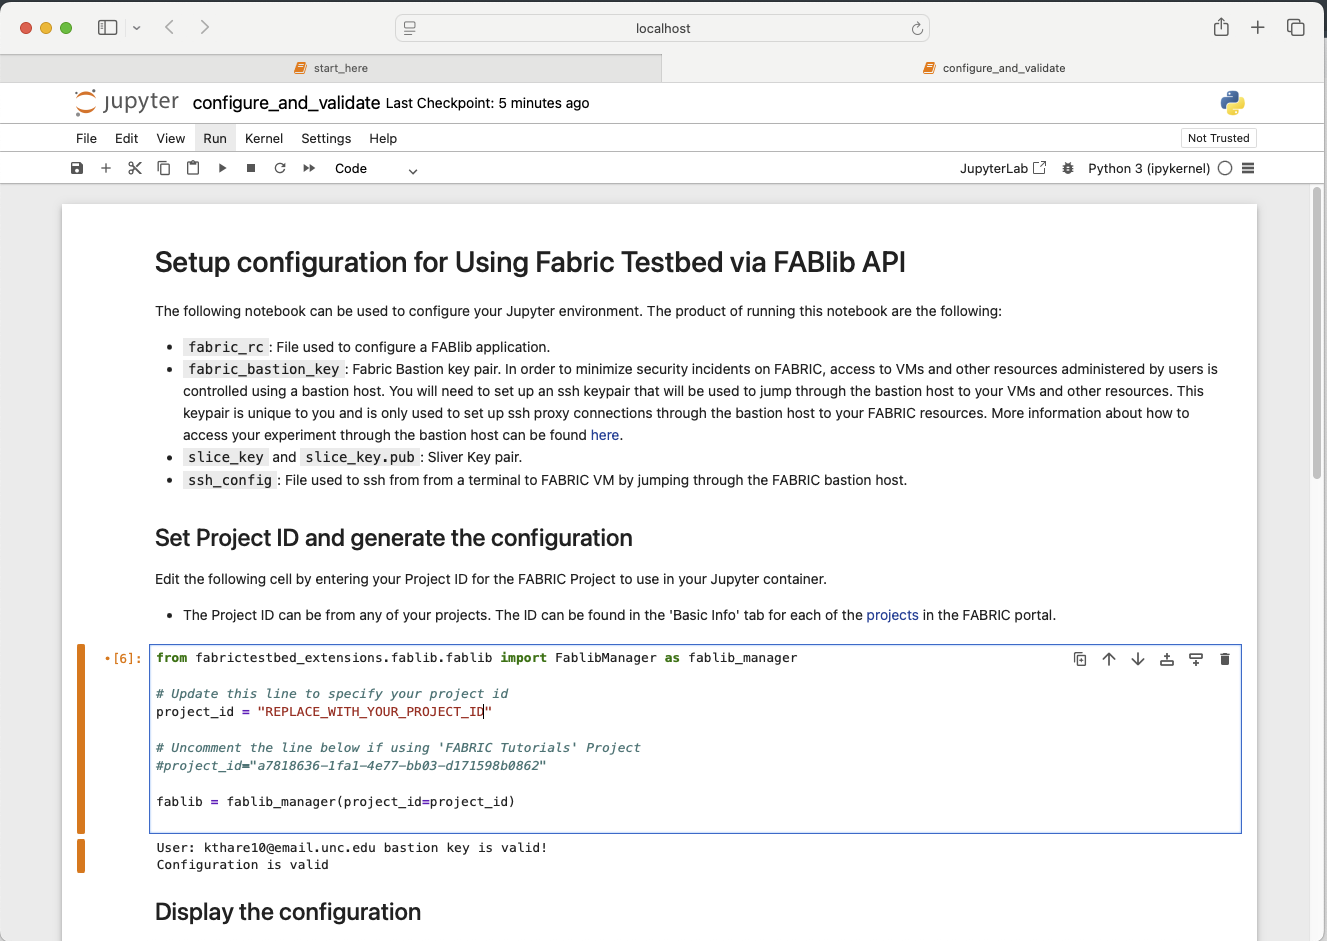
Configure your environment
Trouble Shooting
Error: No module named ‘fabrictestbed’
Upgrading to Python 3.9 occasionally causes errors when importing the FABRIC Python modules. If you see the following error when trying to import the fabrictestbed module the solution is below.
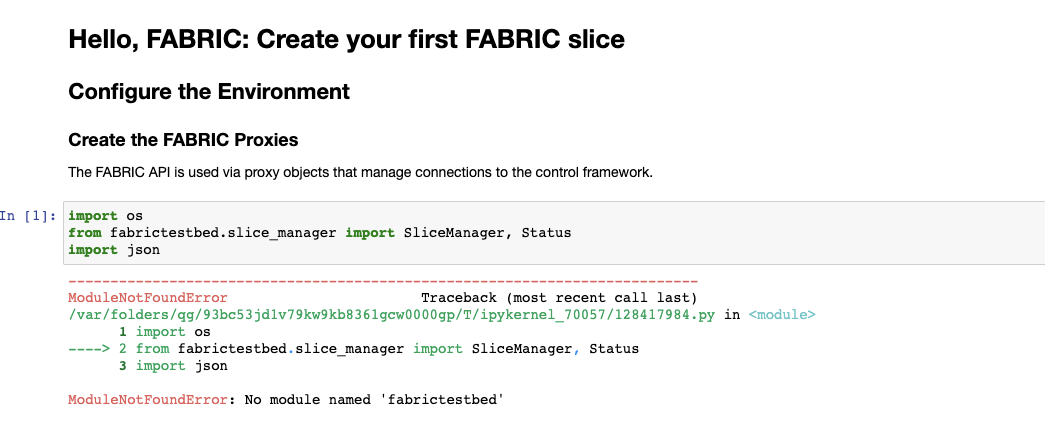
No module named ‘fabrictestbed’
This might have been caused by installing Jupyter when another version of Python was set as the default. Check the Jupyter kernel config file here: /usr/local/share/jupyter/kernels/python3/kernel.json. Edit the Python path to lead to python3.9
{
 "argv": [
  "/usr/local/bin/python3.9",
  "-m",
  "ipykernel_launcher",
  "-f",
  "{connection_file}"
 ],
 "display_name": "Python 3 (ipykernel)",
 "language": "python",
 "metadata": {
  "debugger": true
 }
}
Common Pitfalls & Tips
- Ensure Python is 3.9–3.13.
- Inside the virtual environment, use
python -m pip …to avoid mixing system/site installs. - Verify
FABRIC_TOKEN_LOCATIONpoints to the actual JSON file. - Renew tokens daily (they expire in 24 hours).
I have set this up and have the hello_fabric notebook running.
When I get to Line 11 to create the slice manager object, I get the error KeyError: ‘CILOGON_REFRESH_TOKEN’
I have downloaded the token from the portal and set the env vars. I am logged in and have the FabricPortal open as well. Am I missing a step?
Note I am using a conda env instead of virtualenv.
Are you using a token from the beta portal and using the beta services? These instructions are for the production portal and services. For now, only the beta services are available. You will need to replace the production references to beta for the portal and all services.
I was using the beta portal, but did not have the beta settings for the FABRIC_CREDMGR_HOST and FABRIC_ORCHESTRATOR_HOST env exports.
Also of note the FABRIC_TOKEN_LOCATION has to be absolute, relative does not work.
Thanks
I had the same issue before but later I figured these host could be found via beta jupyterhub – “fabric_examples” – “start_here” – “hello_fabric” – step #3