
This article will walk you through the process of building a slice in FABRIC Portal.
Getting Started
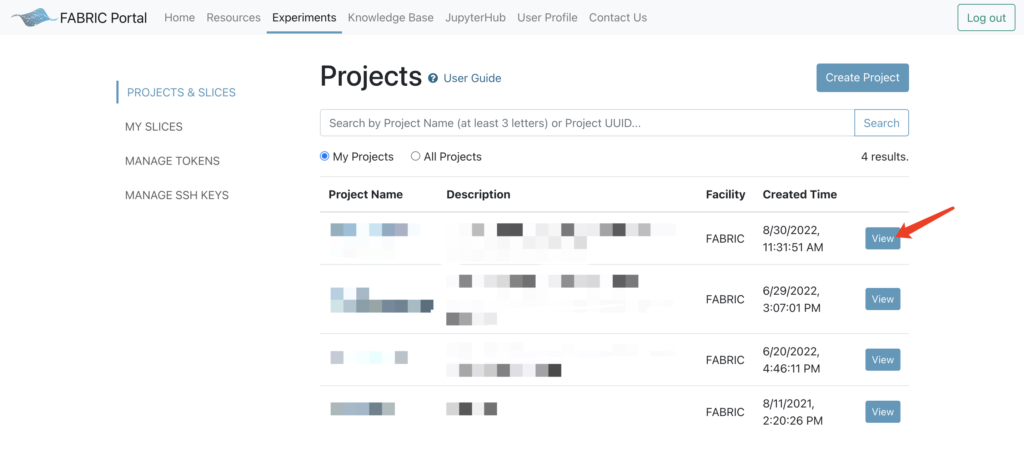
- You need choose a project first from the Experiments page -> Projects & Slices tab. Your rights of FABRIC resources when creating a slice depend on this project’s permissions.
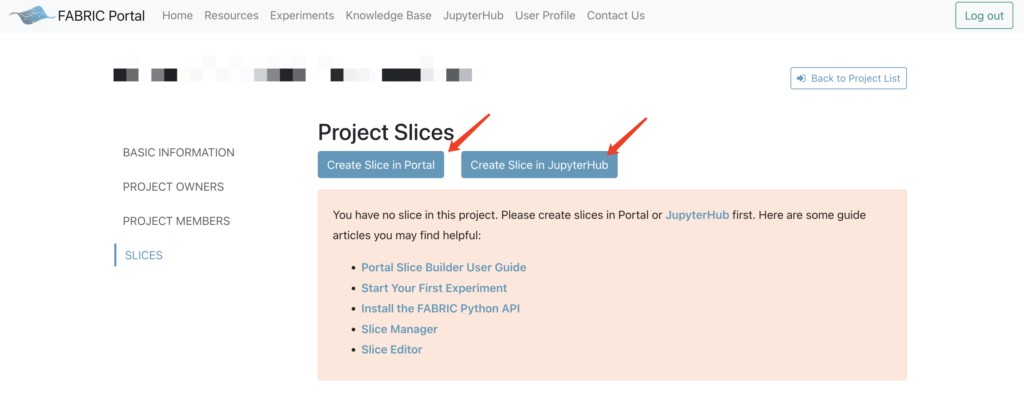
- If you don’t have any slice in this selected project yet, you will see the callout message below. Click the button Create Slice in Portal will lead you to the portal slice builder page; Click the button Create Slice in JupyterHub will lead you to the JupyterHub login interface. Please use the guide articles in the list to help you create slice.
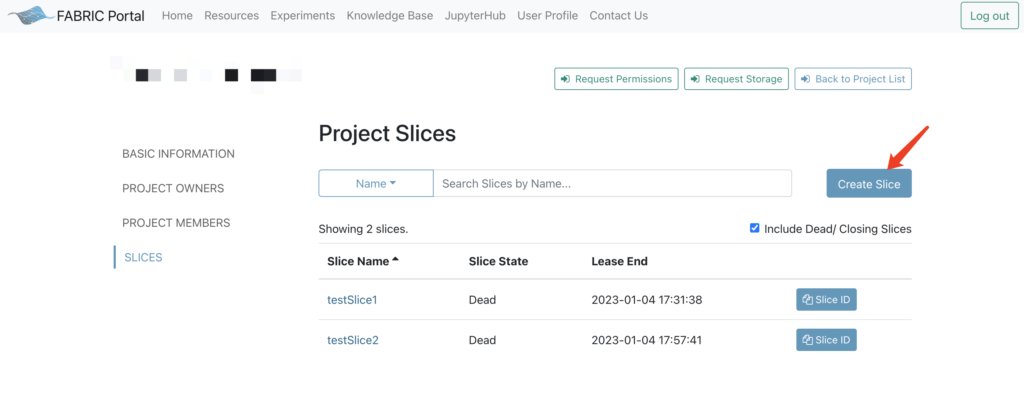
- If you have slices in this selected project, you will see the following slices table with filter and search. Click on the Create Slice button will lead you to the portal slice builder page.
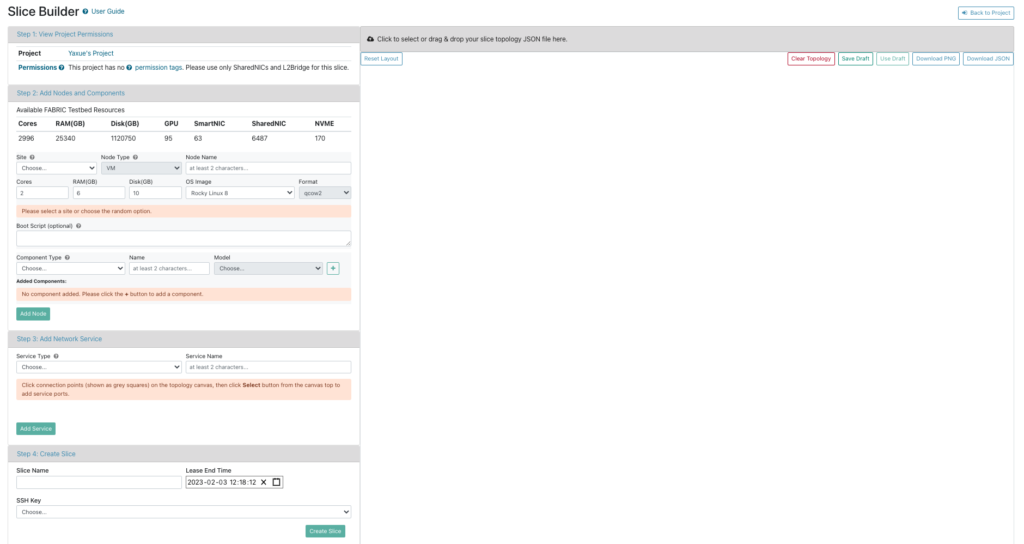
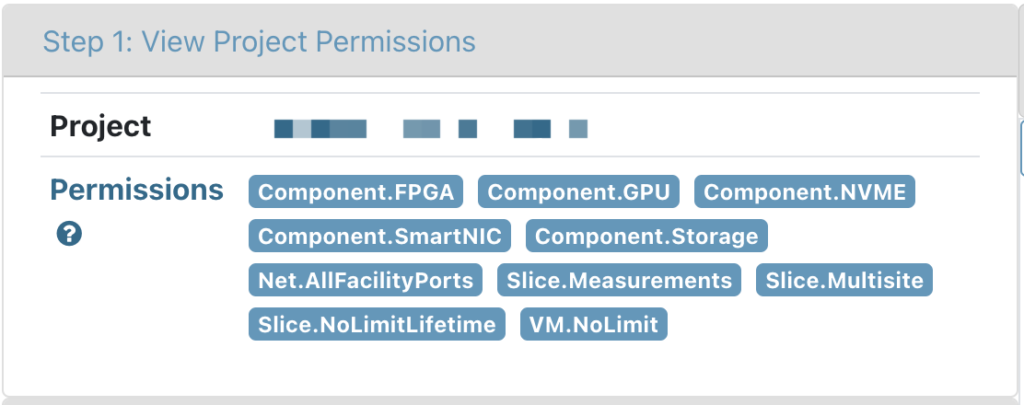
Step 1: View Project Permissions
Project permissions are added to a project by Facility Operators and contains users’ privileges to create a slice.
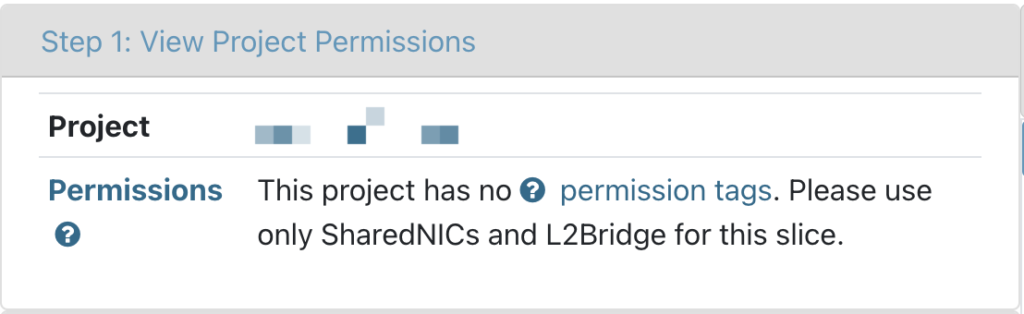
Click Project Permissions link to view the help information of all project permissions and their description.
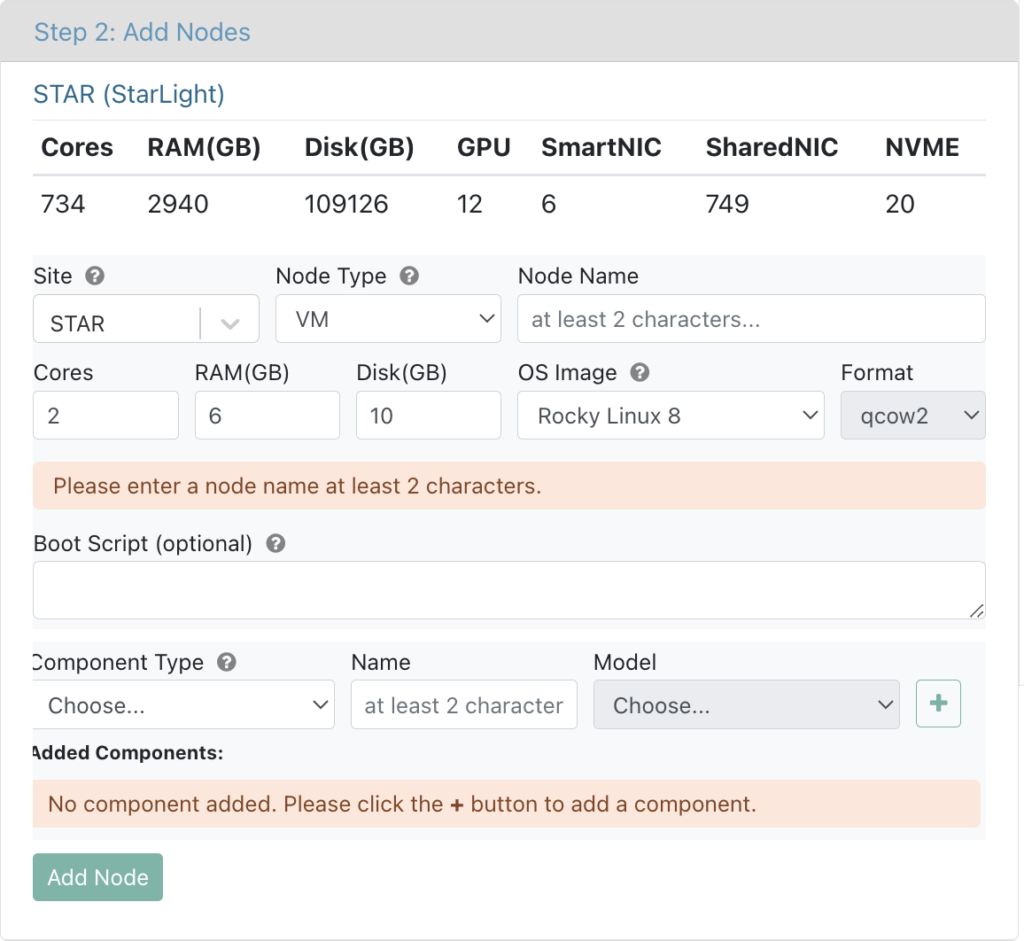
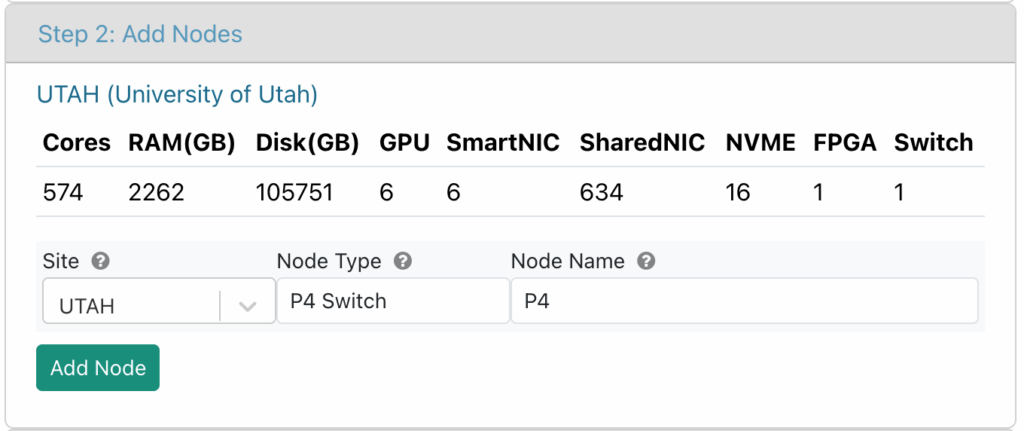
Step 2: Add Nodes and Components
When a site is chosen, available site resources will be displayed for your reference to choose node capacities and components. The current supported node type includes VM, Facility Port and P4 Switch. For VM nodes, there are default values for Cores, RAM, Disk and Image and they are all customizable per your need. Portal only validates user’s input for Cores, RAM, Disk to be positive integers but Orchestrator will find the nearest matching with allowed instance sizes when creating the slice.
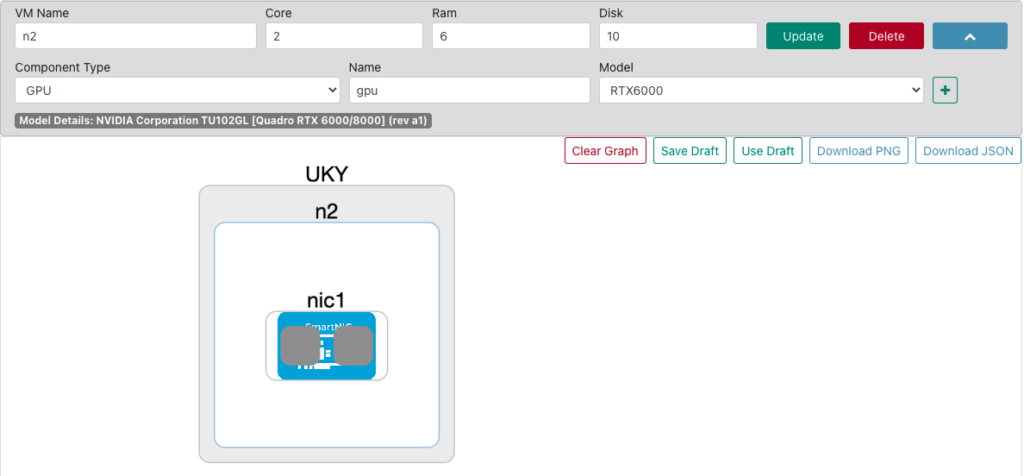
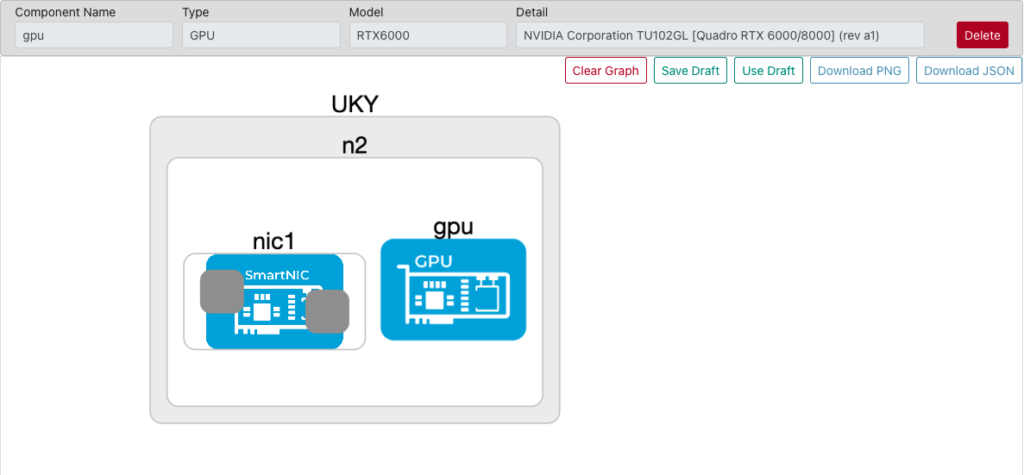
Optionally, you can add components to the VM node by selecting component type, entering component name and specifying the component model, then clicking the add button with plus icon.

Step 3: Add Network Service
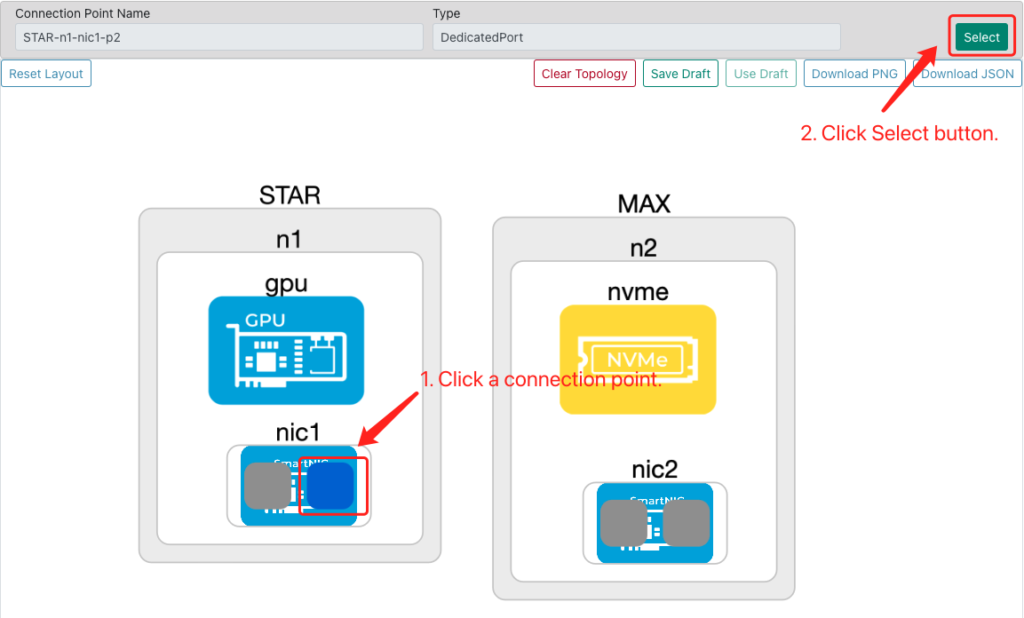
To add network service, you need select connection points first. Click on a grey square on the graph, then its information will be displayed on top of the graph. Click the green Select button then you will see it added to the left panel of Step 3: Add Network Service.
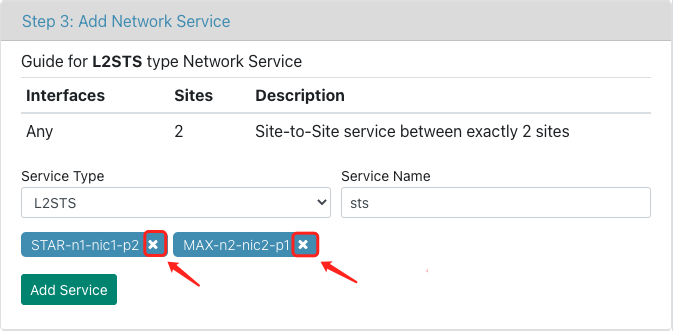
You can remove selected connection points by clicking the white X on the panel of Step 4: Add Network Service. When a service type is chosen, the guide for this type will show on top.
| Interfaces | Sites | Description | |
| L2Bridge | Any | 1 | Broadcast service in a single site. |
| L2PTP | 2 | 2 | Port-to-Port service between exactly 2 sites and both port should be DedicatedPort. |
| L2STS | Any | 2 | Site-to-Site service between exactly 2 sites |
| FABNetv4 | Any | Any | All interfaces in a given site are part of the same broadcast domain and a single /24 per site using the same gateway. Traffic across sites is routed by FABRIC data plane. |
| FABNetv6 | Any | Any | All interfaces in a given site are part of the same broadcast domain and a single /64 per site using the same gateway. Traffic across sites is routed by FABRIC data plane. This service also provides the ability to peer with public IPv6 networks. |
Check/ Modify Slice
You can check the slice topology by viewing the graph, clicking an element to view its details and modifying the graph in following ways:
- Click on a VM, then you can modify its name/ capacity and click the green Update button; you can click the red Delete button then the VM and its child components will be deleted together (if the VM is the only node in its site, the site will be automatically removed too); you can click on the blue button to add a component to this VM node;
- Click on a component (SmartNIC/ SharedNIC/ GPU/ NVME), then you can view its details or delete this component by clicking the red Delete button;
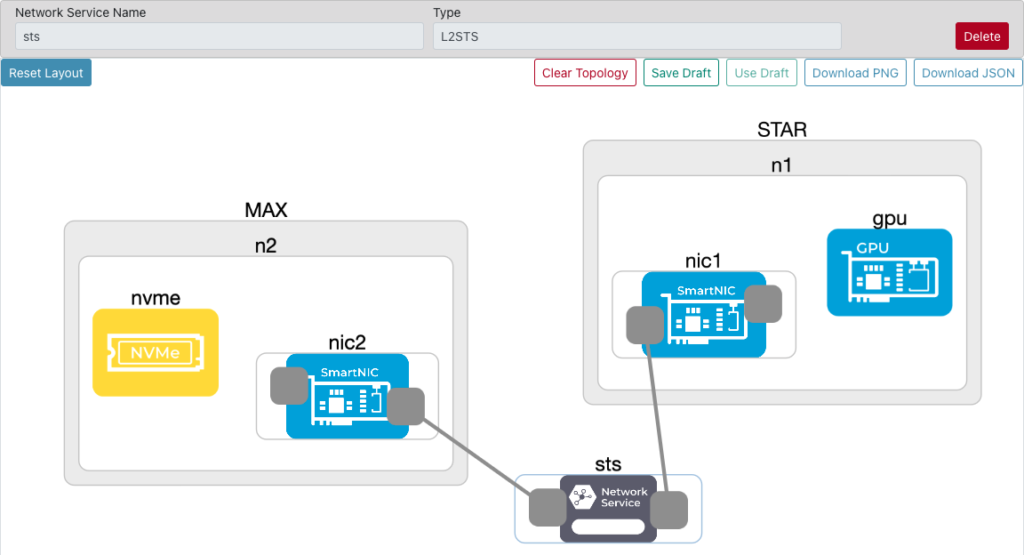
- Click on a Network Service, then you can view its details or delete it by clicking the red Delete button, and its connection points and corresponding links to any NIC ports will be removed together;

- Click on a Network Service connection point, then you can view its details or delete it by clicking the red Delete button, but please make sure the remaining links to align with the type of its Network Service. The current version of slice builder doesn’t support adding connection points and links to an existing Network Service.
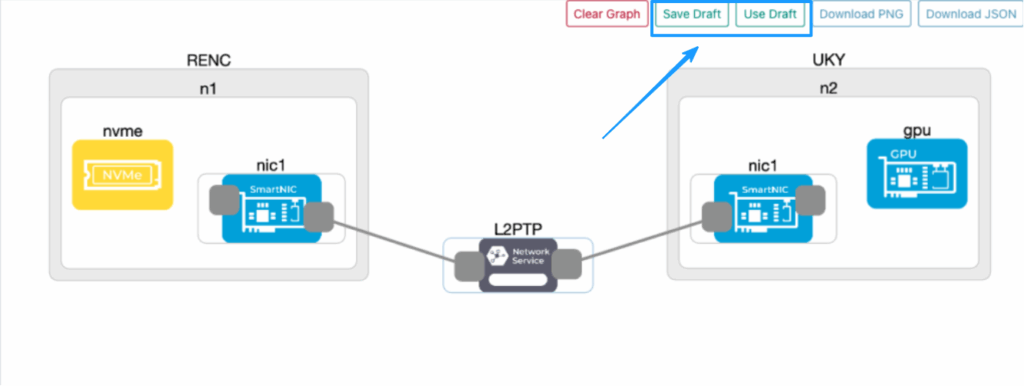
Save/ Use Draft Slice
The Portal Slice Builder allows you to save drafts locally in your browser. When you click Save Draft, the slice topology JSON file is stored in your browser’s local storage. You can then continue editing, make changes, or even start a new slice. At any time, you can retrieve your saved slice by clicking Use Draft, which will reload the saved topology and let you generate it again.
Step 4: Create Slice
You need input a slice name, select at least one sliver key to create slice. The lease start time and lease end time are optional and the default end time is 24 hours upon creation.
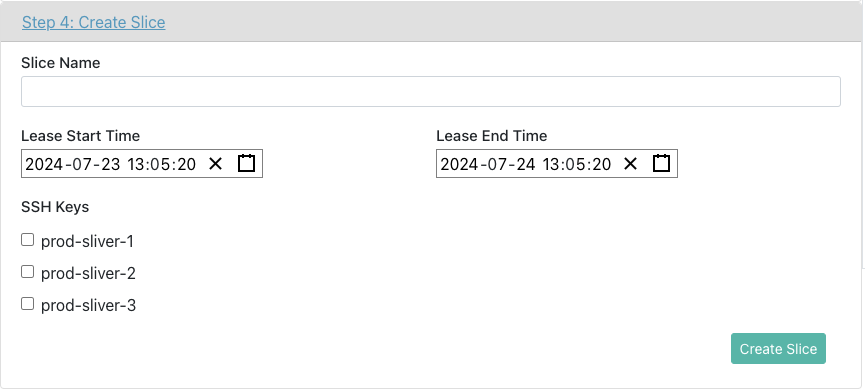
Click the Create Slice button.
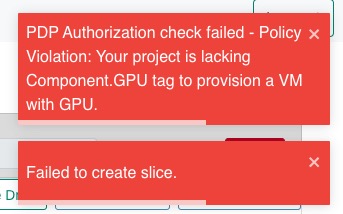
- If there are issues in your slice graph, please modify your slice according to the toast error message shown on the top right corner and try to create slice again.
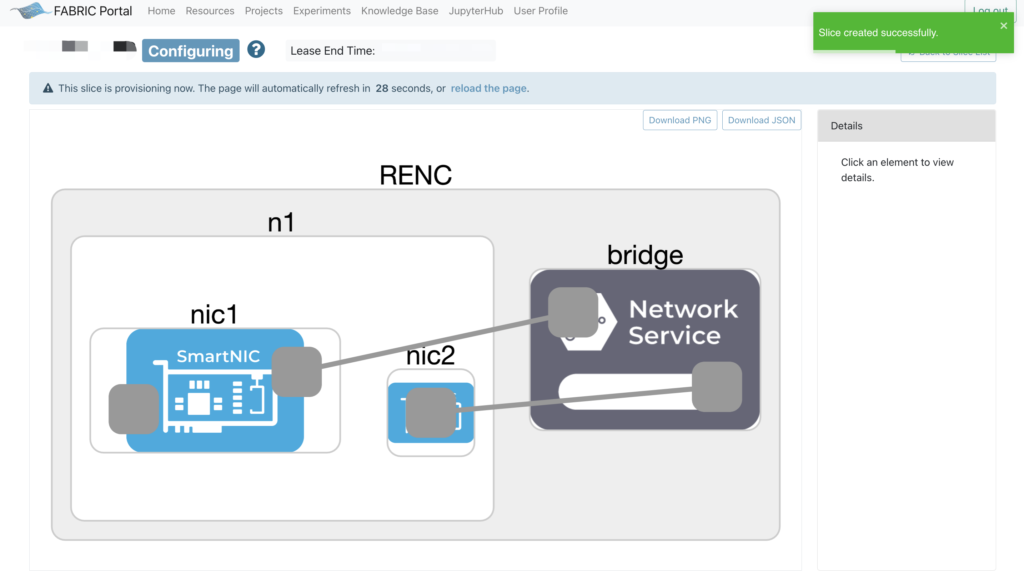
- If the slice is created successfully, it will redirect to the slice viewer page automatically with the new generated slice data. The initial state for the new slice will be Configuring, and the page will refresh automatically every 30 seconds until the slice finishes configuring. You can also click reload the page to manually refresh.
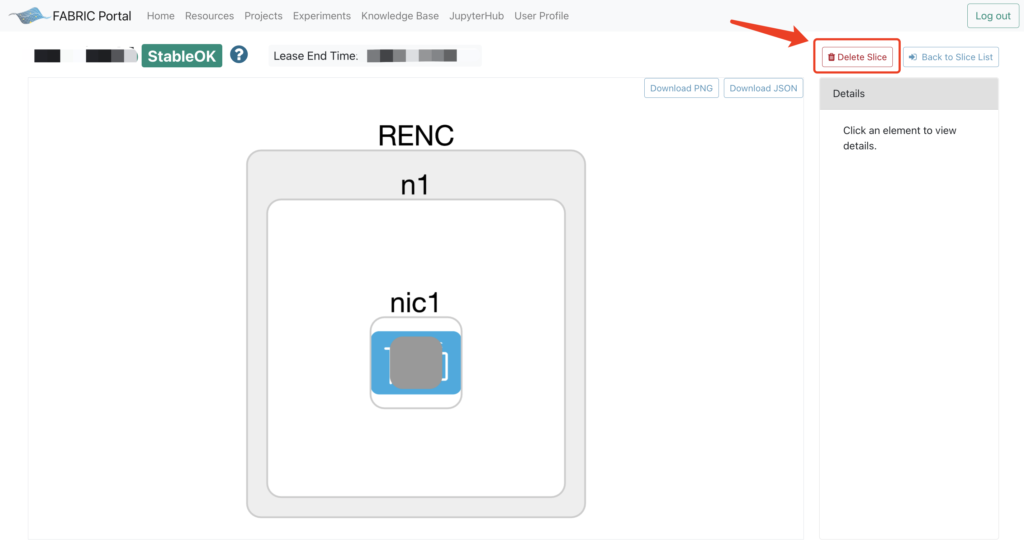
- For slices in state StableOK or StableError, click Delete Slice button to delete the slice. This process cannot be undone but you can find deleted slices by checking the Include Dead/ Closing Slices radio button on Experiments -> Slices page.
- The slice may change to Closing or Dead states due to insufficient requested resources, and the error details will be shown in a table on top of the Slice Viewer page.

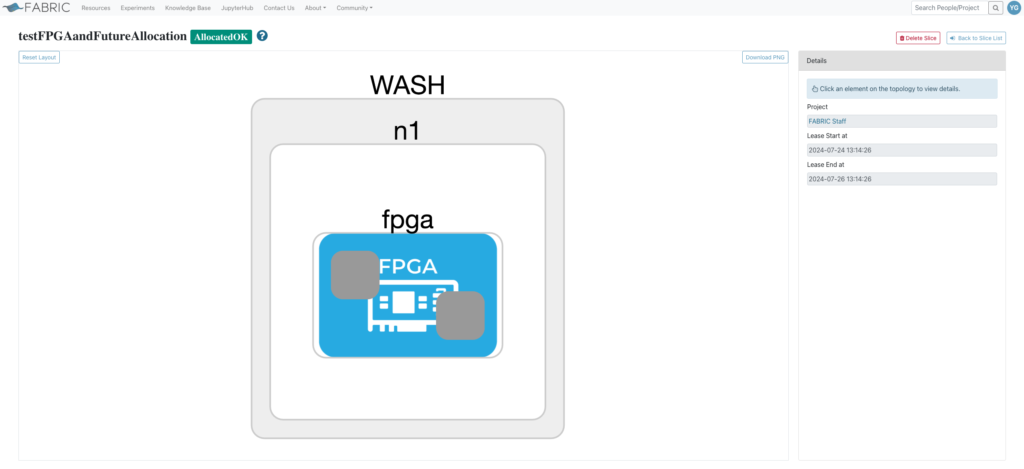
- If you choose a lease start time for future allocation, the slice state will change to AllocatedOK or AllocatedError based on if the request is successful.
Slice States
There are 6 types of states for a slice.
- For Configuring slices, wait until the Slice is in either StableOK or StableError to access resources; or if you set lease start time for future allocation, the states state will change to AllocatedOK or AllocatedError.
- For StableError slices, the specific failure can be found by looking at each specific Sliver.
- Slice will go to Closing state and then transits to Dead when user triggers a delete or the requested resources are not available.
| State | Introduction |
| Nascent | Indicates a new slice which has just been created |
| Configuring | Indicates a slice which has slivers being ticketing/ticketed at the Broker or redeeming at the Site |
| StableOK | Indicates a slice which has slivers either in Active or Closed state |
| StableError | Indicates a slice which has slivers either in Active, Closed or Failed state |
| AllocatedOK | Indicates a slice which has slivers either in Ticketed or Closed state for a future allocation |
| AllocatedError | Indicates a slice which has slivers either in Active, Failed or Closed state for a future allocation |
| ModifyOK | Indicates slice which was modified successfully and has slivers in Active or Closed state |
| ModifyError | Indicates slice which was modified partially successfully and has slivers in Active, Closed or Failed state |
| Closing | Indicates a slice for which close has been triggered for all the slivers |
| Dead | Indicates a slice for which all slivers are in Closed state |